Summary
A while ago, I encountered the need to set up a few websites. Firstly, the consulting firm I founded, Eangineer Consulting, needed a website. Additionally, I had been considering establishing some kind of blog or portfolio site for a long time, to record my experiences and insights related to IT and Enterprise Architecture, among other things. Although I had been involved with web technologies to a considerable extent before, my approach had been more from an architectural and design perspective; however, it had been a while since I had been hands-on with it. I concluded that this was a good opportunity to update my understanding and skills a bit and to create the websites myself.
Key Technologies & Skills
- WordPress
- WordPress plugins
- WordPress themes
- CSS Customization
- Certbot and Let’s Encrypt
- Linux + Apache + MySQL
- Google SEO
Web technologies as a whole are, of course, an extremely broad area. Although the foundation nowadays largely revolves around the standardized trio of HTML+CSS+JavaScript, there are countless libraries and frameworks to facilitate and speed up work when building on top of this foundation. Even professionals solely focused on web development have to make decisions about which frameworks and libraries to choose as their core expertise.
Since my project doesn’t require anything too exotic, and the sites are quite static and limited in scope, I decided at this stage to bypass those choices and start with a complete publishing platform and CMS (Content Management System), WordPress. More ground-up approach into building a web app is in order later, likely using e.g. Django framework.
WordPress is a very popular and widely used solution for publishing and hosting blogs and websites. Its advantages include easy setup, a wide selection of ready-made themes for site layout, and a comprehensive range of plugins for extending functionality. The downside is incompleteness and vagueness in certain areas, especially if using WordPress’s new “Full Site Editor” workspace. In practice this “work-in-progress” nature of WordPress means it’s easy to get started, but when a real website of any complexity needs to be published, the user finds himself combing through various forums ands discussions for additional insight. I’ll revisit some examples of such difficulties later in this article.
Setting up WordPress
Desiring full control over the setup, any hosted versions of WordPress were ruled out. For those primarily interested in quickly publishing content, a hosted environment such as wordpress.com might have been the preferred approach. However, in this instance, an architecture allowing for total control over every aspect was chosen:
- Azure virtual machine running Ubuntu Linux
- MySQL database
- Apache 2 web server
Additionally, fail2ban was utilized to enhance SSH shell access security, and Certbot + letsencrypt.org were employed to manage SSL certificates for the sites. Backups were established using a few simple shell scripts to back up both the MySQL databases and Apache/WordPress site directories.
Beyond the WordPress server itself, Sendgrid serves as the email service to deliver notifications and other emails generated by the WordPress instance.
Setting up the foundation was reasonably straightforward. However, one glitch arose: in the WordPress Site Health tool, a test named “Your site can perform loopback requests” was failing. It emerged that the Azure firewall does not permit the server to access itself through its own public network-address-translated (NAT) IP address. The remedy is to add the site’s fully qualified domain name to the hosts file and make it point to the local loopback address (127.0.0.1).
Plugins
As mentioned, both the Eangineer Consulting company website (which is not yet published) and this personal portfolio site of mine are reasonably simple in structure. This portfolio site, for example, consists essentially of just the front page plus a bunch of articles created as WordPress “posts”. However, I do plan to categorize my articles, so a simplistic set of categories was created to organize the content going forward.
In terms of extending functionality, several additional plugins were installed:
- Yoast Duplicate Post (to make copies of posts)
- Yoast SEO (to better control the site’s search engine visibility)
- WP Forms Lite (for Contact Us form and gated content on Eangineer Consulting website)
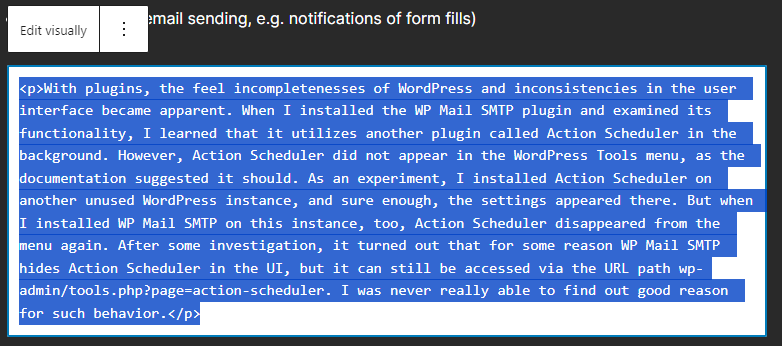
- WP Mail SMTP (email sending, e.g. notifications of form fills)
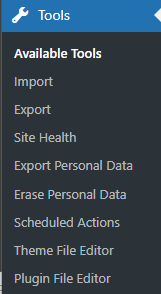
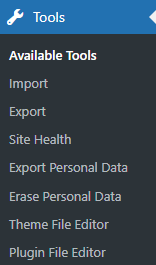
With plugins, some of the inconsistencies in the user interface became apparent. When the WP Mail SMTP plugin was installed, I learned it utilizes another plugin called Action Scheduler in the background. However, Action Scheduler did not appear in the WordPress Tools menu, as the documentation suggested it should. As an experiment, Action Scheduler was installed on another, clean instance of WordPress, and sure enough, the settings appeared there. But as soon asWP Mail SMTP was installed on this instance, too, Action Scheduler disappeared again. After some investigation, it turned out that for some reason WP Mail SMTP hides Action Scheduler in the UI, but it can still be accessed via the URL path wp-admin/tools.php?page=action-scheduler. I was never really able to find out good reason for such behavior.
Themes and Styles
With themes, produced by various third parties, the variance in quality is also present. Admittedly, without too much evaluation, I decided to start the portfolio site with a theme called Waver. It looks nice, but comes with some glitches. For instance, in some cases, it uses CSS selectors so generic that the WordPress editor is impacted. For example, this is how “Edit in HTML” window looks like with the Waver theme:
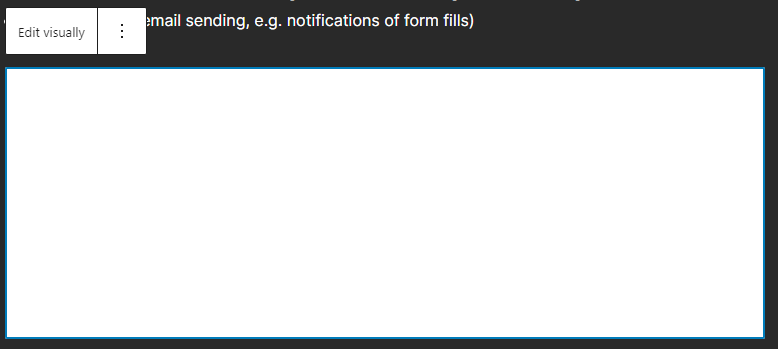
There’s content, but it’s not visible because both text and background colors are white, apparent when selecting the text:
This issue got fixed by restricting the following selectors to specific parent classes only (in the original version, class selector p[class*="comment-form-"] was missing):
p[class*="comment-form-"] input[type="text"],
p[class*="comment-form-"] input[type="email"],
p[class*="comment-form-"] input[type="password"],
p[class*="comment-form-"] input[type="url"],
p[class*="comment-form-"] input[type="search"],
p[class*="comment-form-"] textarea {
  border-style: solid;
  border-width: 1px;
  border-color: var(--wp--preset--color--secondary-300);
  border-radius: var(--wp--custom--border-radius--medium);
  outline: none !important;
  padding: 1rem;
  font-size: 16px;
  color: currentColor;
}
Another similar issue occurs with post comments section, where individual fields have different background colors, and the white fields also have white as the text color:
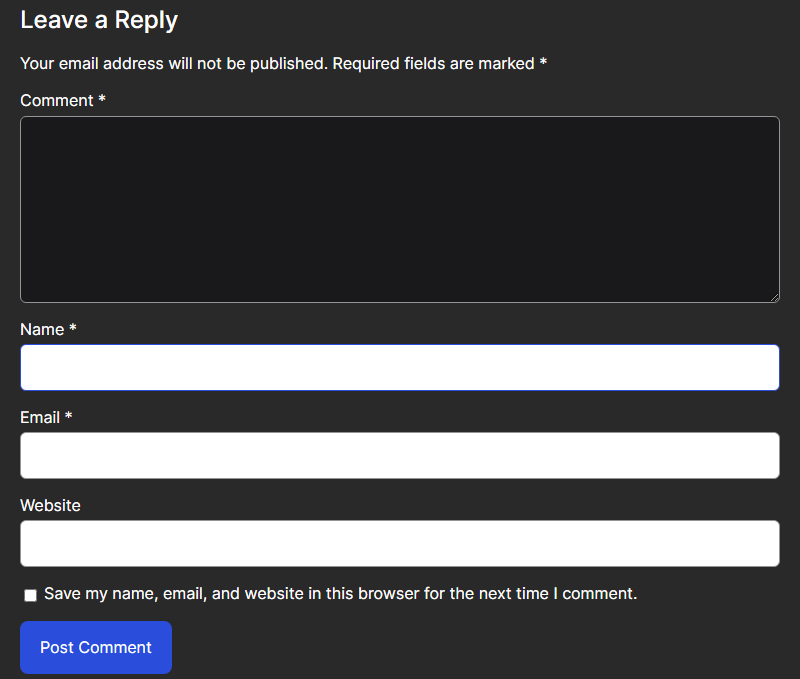
In the editor, this whole area is added by a single Comments Form block, so the styles of separate fields cannot be individually set through the UI. This one was relatively easy to fix, by updating relevant part in theme’s style.css. Excerpt from the original file:
.wp-block-comments textarea#comment {
  margin-top: 5px;
  background-color: var(--wp--preset--color--secondary-50);
}
Updated version:
.wp-block-comments textarea#comment,
.wp-block-comments input#author,
.wp-block-comments input#email,
.wp-block-comments input#url,
.wp-block-comments input#search {
  margin-top: 5px;
  background-color: var(--wp--preset--color--secondary-50);
}
Fixing these CSS styling issues can be a tedious excercise. In addition, it makes updating themes to their latest versions risky business, as the modified files may get overwritten with vanilla version, requiring manual fixes to be introduced again. This emphasized how important it is to evaluate and experiment with different themes to find a robust one. It is apparenly reasonably straightforward to implement themes looking good on the surface, but not working that well in real use. Luckily, changing themes is really easy and robust in WordPress, alleviating the pain caused by poor-quality themes a lot.
Breakpoints
One area now that well supported in WordPress UI are so-called breakpoints. I.e., certain fixed, hard-coded viewport width values, at which WordPress blocks change their layout. For instance, a columns within a columns block are arranged next to each other on wider displays, but when the display becomes narrow enough, the columns are stacked above eacher other. In general, this is very helpful functionality, making it easy to create mobile-friendly content. However, changing the breakpoint widths is not that straightforward, especially if needed only for specific blocks.
One specific scenario is where the columns block stacks its columns too “early”, i.e, when the display widht could still support having columns next to each other. For example, my iPad’s dispaly widht is such that all columns get stacked, leading to a lot of unused screen estate and visually unpleasing end result. Fortunately, WordPress makes it rather easy to add custom CSS classes to block; the following snippet can be used to change the breakpoint for a specific columns block:
/* Change Columns breakpoint to 640px */
@media (max-width: 639px){
.my-custom-breakpoint.wp-block-columns:not(.is-not-stacked-on-mobile) {
flex-wrap: wrap !important;
}
.my-custom-breakpoint.wp-block-columns:not(.is-not-stacked-on-mobile)>.wp-block-column {
flex-basis: 100% !important;
}
}
@media (min-width: 640px) and (max-width: 781px) {
.my-custom-breakpoint.wp-block-columns:not(.is-not-stacked-on-mobile) {
flex-wrap: nowrap !important;
}
.my-custom-breakpoint.wp-block-columns:not(.is-not-stacked-on-mobile)>.wp-block-column-m1 {
flex-grow: 0 !important;
flex-basis: 25% !important;
}
.my-custom-breakpoint.wp-block-columns:not(.is-not-stacked-on-mobile)>.wp-block-column-m2 {
flex-grow: 0 !important;
flex-basis: 75% !important;
}
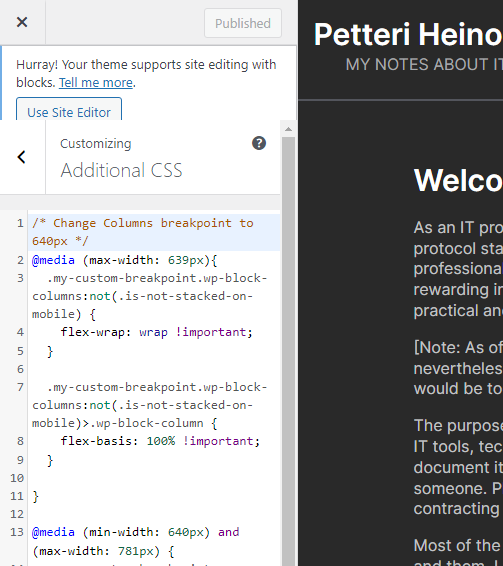
}Another shortcoming with the curret version of WordPress is that it is not clear where to add such additional CSS code, however. By default, with FSE block themes, there is no “Customize” option available in WP Admin. However, the UI can still be access through URL path /wp-admin/customize.php. But even with that, editing the CSS is tricky because only a narrow “Additional CSS” area is available:
Pages vs. Templates Confusion
One area causing some confusion in WordPress, especially with block themes, is the separation of templates from posts/pages. In theory, it should be clear: posts & pages are for content, and templates for the layout and visuals. However, there are some confusing aspects to it:
- At least with some themes (for example, Waver) all the front page content is actully in the front page template. An actual page for the front page needs to exist, so that it can be set in WordPress setings, but its contents are not necessarily used for anything.
- Similar situation witht the “Posts” page; it must exist, but what is actually shown is defined in a template named “Index”. Posts page contents are not used at al.
However, ones the one-off special pages such as the front page, posts page and privacy policy are in place, managing the actual content is straightforward.
Search Engine Visibility
SEO (Search Engine Optimization) as whole is a complex and nuanced topic. However, it is less and less of a black art nowadays, as major search providers simply prefer sites with relevant content following fundamental web content best practices. There’s less and less need to figure out where to put the keywords, what metadata needs to go where, etc. etc. Just create a site following fundamental best practices, and create valid, interesting content, and you should be good.
There are a few steps to take, to make sure fundamentals are in place, though:
- Make sure Google and other search providers can access the site (i.e. no firewalls or web server settings block access)
- Make sure the site has sitemaps available. Yoast SEO plugin can help generate these xml files automatically.
- Let the search engines know about sitemaps.
- Make sure search providers crawl and index your site.
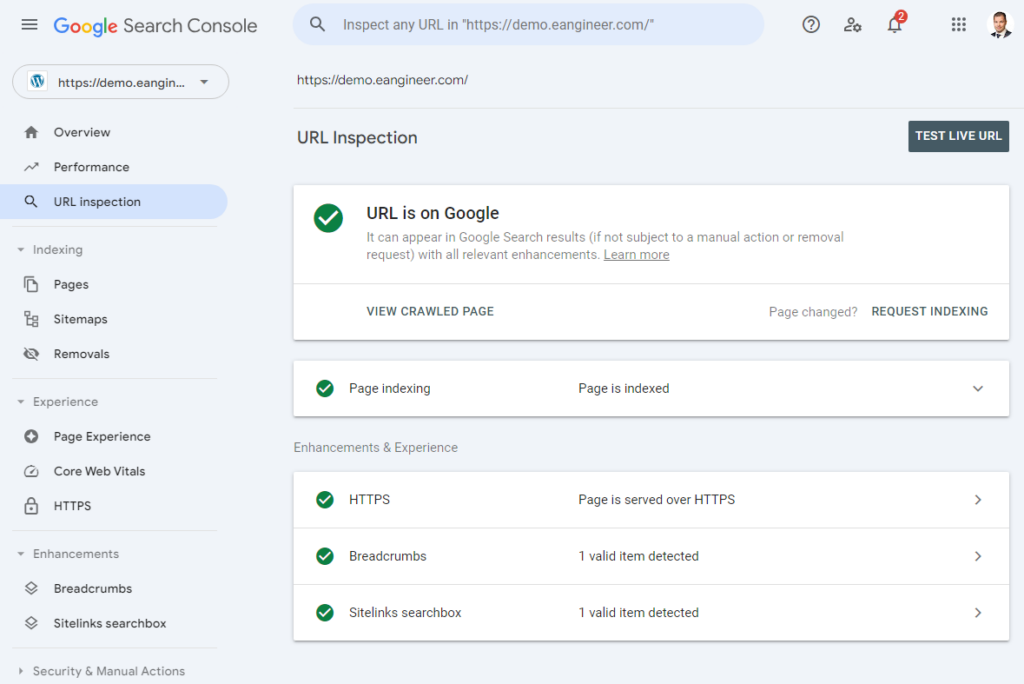
At least Google provides excellent tools to validate these steps by its Google Search Console.